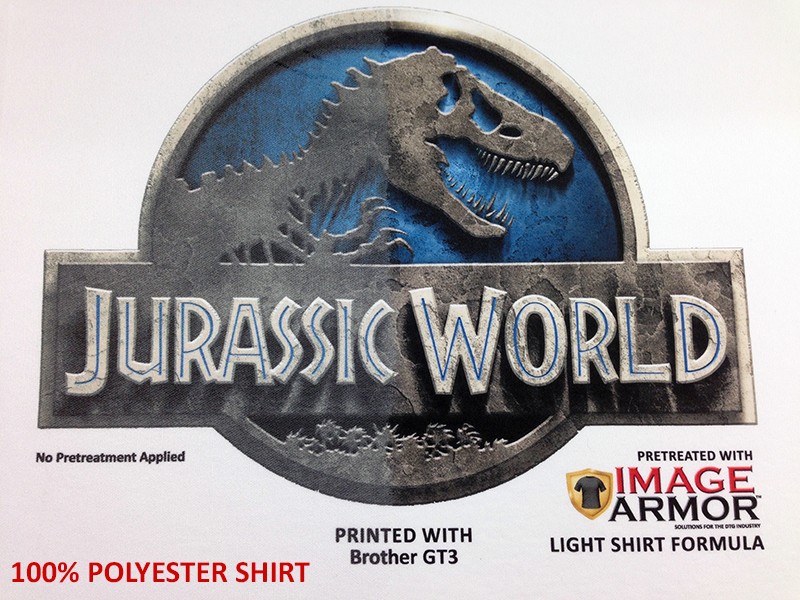
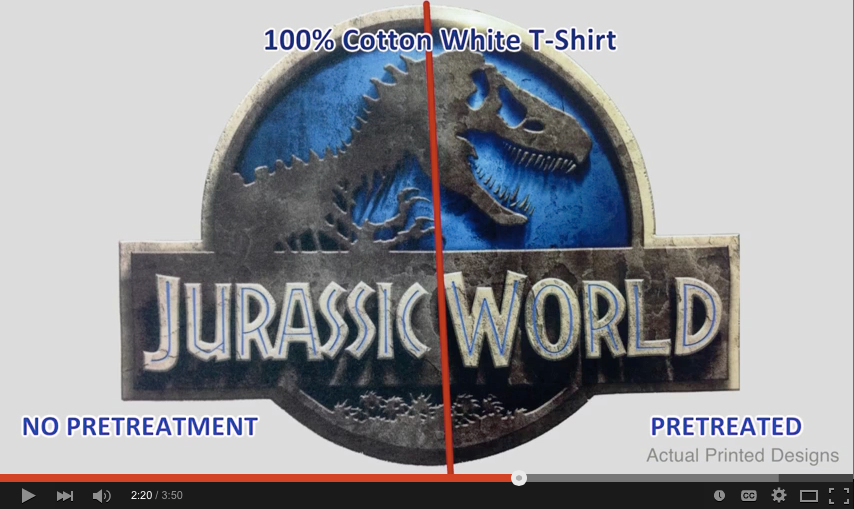
WHITE INK PRINTING ON BLACK 100% POLYESTER – FLASHBACK THURSDAY
Many people have been asking about white ink printing on black polyester. This is not really new as Image Armor posted this article over a year ago on our webpage. We’ve been printing white ink on black polyester for well over a year… figured a FLASHBACK THURSDAY was in order since many people have been inquiring about it again.
 Updated
 3:10 p, 9/3/15 2:08p 9/8/15
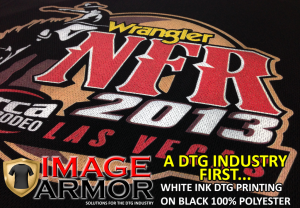
Image Armor, LLC is proud to announce that in an industry first for Epson re-purposed printers we have achieved white ink printing with superior wash fastness on black 100% polyester fabrics. Previously there were serious dye migration and wash issues associated with trying to print white ink on black polyester fabrics. With Image Armor’s new E-SERIES DTG Inks for Epson re-purposed printers and our ULTRA pretreatment we’ve created, and are still perfecting, the process to now make this a production oriented process for ANY Direct to Garment printing shop.
In the past you’d have had to either screen print or use a Cad-Cut type material to do dark polyester fabrics. The incredible ink properties of the E-SERIES DTG Inks allow for incredible stretchability as well as adhesion even to synthetic fabrics such as polyester.
We will outline this process for everyone so that they can achieve these results on their own utilizing their own DTG equipment. The two main things that are needed are the E-SERIES DTG inks and the ULTRA Formula pretreatment.
The Process
Picking a good polyester shirt is the first step in successfully printing black polyester. We utilized the Sport-Tek ST340 for this specific test, but are currently testing a variety of other polyester shirt makes, styles and manufacturers. This is a cationic dyed polyester shirt which means the process used to dye the shirt to the color desired happens at a lower temperature. For us that means less dye migration when heating to cure the ink. However, we are still testing other polyester shirts and dye processes because the Image Armor E-SERIES inks cure in 35 seconds or less which definitely helps the process of mitigating the potential for dye migration.
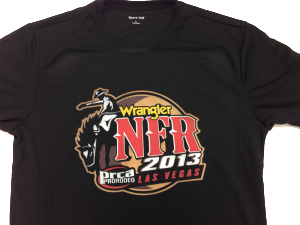
PRETREATING
Pretreating is relatively straight forward like any shirt. We applied 32 grams of Image Armor ULTRA pretreatment. However, higher amounts could be applied up to 40 grams or so. The shirt was then heat set but here’s where we deviate from the standard pretreatment heat setting process. We set the heat press to 356F and set the pressure so that when we lower the heat press platen onto the garment that there is just “contact” with the shirt – no pressure period. Due to no pressure, the pretreatment will take longer to steam off and “dry”. Instead of the standard 35-40 seconds you might end up doing two 30-35 second presses. Make sure to utilize a cover sheet during pressing but avoid teflon as it could potentially shine up the polyester fabric.
If you end up using too much pressure you will definitely see a noticeable area or what is known as a “heat press mark”. Typically this mark is a definite, visible mark that looks like the fabric is melted slightly and will not wash out. This is why we utilize virtually no pressure on the fabric during the curing of the pretreatment.
Please note, that when you pull the shirt out of the heat press it may be extremely stiff. This is normal. If you allow the shirt to cool down, it will return to its normal “loose” fabric feel it had prior to pretreating.
PRINTING
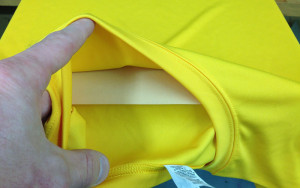
The printing process is relatively straight forward like the pretreating process, however some printers and RIPs may be better suited for printing white ink on polyester fabrics than others. Loading the shirt onto the platen is a very crucial part of this process. You want to be able to thread the shirt onto the platen for optimal performance of the print. If your printer platen only allows you to lay the entire shirt onto the platen you will run into some issues with ink passing through the first layer of the shirt and depositing onto the inside of the back of the shirt. This happens because the weave of most polyester fabrics are not a super-tight weave leaving a lot of open air areas between the threads. DTG printer ink can not bridge this gap and thus the ink will just jet through onto whatever is behind it. In this case the inside of the back of the shirt.
One solution is to utilize a slip sheet in between the layers of the shirt however this can cause issues due to the amount of ink being deposited. The ink will soak the paper and cause it to swell and possibly bubble up, raising the surface of the shirt enough that you might run into a head strike. Due to the high concentration of pretreatment a head strike can quickly clog up nozzles in a print head and possibly leading to a replacement of the printhead.
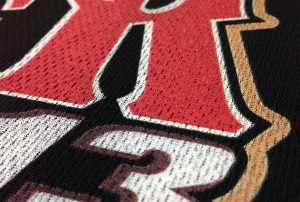
The main point is you want to lay down as much white ink as possible on the first pass for the underbase. You will need to apply typically more ink than on a 100% cotton shirt. How much white ink you can lay down in a single pass will be dependent upon the printer and the RIP. Some printers, like the Epson PRO series printers (i.e. 3880) will not allow as much ink to be deposited as say an Epson 3000 printer. You will have to do independent testing with the type of printer you have and the RIP.
Working on conjunction with the amount of ink the printer can physically lay down is the RIP. The RIP will also limit how much ink you can deposit. Polyester will require 1.5-3 times the white ink to achieve a great looking finished product when compared to a 100% cotton shirt. Of course, testing with your own equipment and settings will be required. Laying down too much white ink can result in the white ink not being “kicked over” enough and then when the CMYK is applied it will look great on the printer platen, but when you heat press the ink it will blend into the white causing a dulling and image clarity degradation. So, finding the optimal amount of white ink for your printer will take some testing.
You DO NOT want to deposit a lot of white ink on the second, or highlight pass. This is because all the pretreatment has been used up in kicking over the initial deposit of white ink. The addition of printing more white ink will result in a serious wicking of moisture and components from the ink into the surrounding polyester fibers. The ink will either “spider out” or create a halo around the image which may or may not wash out after printing. Many times, when depositing a lot of white ink on the underbase, you will still get this halo effect. This will usually wash out in the first wash and is most noticeable on lighter colored garments.
We have found that certain colors of polyester, especially red and maroon will most likely still dye migrate during the curing process and even after the cure has been completed. This is something we are still working on, however it is still going to be an ongoing issue in dealing with our water based inks.
CURING THE INK
Again, the key to making white ink printing on black polyester is found in the characteristics of the inks and how they cure. The Image Armor E-SERIES inks cure at 356F for 35 seconds. This works in our favor with polyester fabrics due to the shorter cure time. However, with the amount of white ink deposited and a much lighter (just touching) pressure on the heat press, we still need to ensure that the entire ink film has the moisture removed AND gets above 310F. Use a cover sheet when heat curing the ink and after 35 seconds lift to let any moisture escape. You might also want to try two 20 second presses. Getting rid of the moisture is key and allowing the ink to achieve full curing status temperature. If you put your hand over the print just after releasing the heat press and you can still “feel” moisture coming off the print, it most likely is not done curing or dry. You will need to ensure a full cure, otherwise the print will start flaking off after just a couple of washes.
Some have asked about hovering or utilizing a conveyor dryer. Though we have not tested the conveyor dryer at this time, hovering a heat press does not seem to work really well. The inks will try wrapping around the fibers leaving “cracks” in the colors resulting in a less than desirable print.
Again, we do not want to utilize pressure on the heat press to avoid the heat press mark. These don’t really wash out because we’ve altered the fabric with excessive heat and pressure. You DO need to ensure that you have enough pressure though to help accelerate the curing of the ink…it is like a dance and you have to find the right combination of steps to make it all work properly. Test, test, test.
Also, make note that the shirt will come off the heat press and as it starts to cool, will become very stiff. Do not worry. In our testing the shirts returned back to normal flexibility with little to no hand on the shirt after 10-15 minutes.
WASHING OF THE GARMENT
We would highly recommend washing the garment prior to wearing obviously as with any DTG printed shirt. However, the wash characteristics are extremely favorable due to the way we formulated the E-SERIES inks. Other than regular washing techniques suggested for the specific fabric, we really do not have any other requirements for good washing. As long as the ink is cured it will wash extremely well. We tested our shirts in the extreme of washing – hot water during the wash and high heat during the drying of the shirt. For optimal results warm to cold water washing and hang drying of the garment will result in the longest life of the shirt and print.
MAKING IT ALL HAPPEN
Due to the nature of the E-SERIES inks we have been able to achieve really good results while printing on black 100% polyester fabrics. In fact, some look as good or better than screen printed designs and could easily pass for standard screen printing. There is still a lot of work to do to perfect this process, but we are making great strides to achieve an industry wide, easy to accomplish task. We’ve only been able to do this with the Image Armor inks and not any other brands within the Epson re-purposed printers. So, you no longer need to be confined to just cotton shirts. Let the power of the E-SERIES inks open new doors and profit opportunities for your business.

