DTG Tip – Making Your DTG Print Look Like It Is Screen Printed With Halftones
Many high end screen prints are done using halftones. Halftones are basically different sized dots of different colors that are placed in close proximity to each other to give the effect of a multitude of colors thus reproducing your graphic in full color. Your inkjet printer does the same basic thing but with really, really tiny ink droplets. When you screen print, you are limited to how small the dots can go before you can not screen print them. This is because the screen that has the image “template” on it can only hold a dot down to a certain size. With inkjet, the dots are extremely tiny which is why we can get a lot higher resolution and tighter, better looking images.
If you really want to make your DTG print look like a high end screen print it is really easy to do and can be done relatively quickly in Photoshop with a couple of clicks of your mouse.
How Do I Make Halftones In Photoshop?
To convert your image into “halftones” in Photoshop, follow these simple steps.
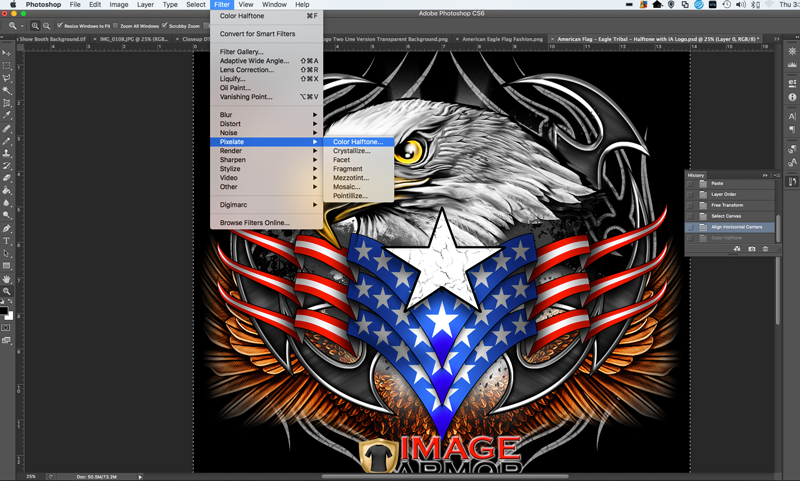
- Load in your graphic and select the layer you want to “convert” to halftones. Go to Filter > Pixelate > Color Halftone

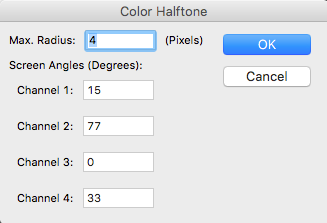
- You will then see a pop-up screen that looks like below:
- The Max Radius is the “size” of the halftone dot. For bigger dots, make the number higher. For smaller halftone dots, reduce it. 4 is the size of our sample image. We have found that 8 will give a larger halftone dot, the image will be more “grainy” but the image will be smoother with no interference on the screen angles.
- Set the “screen angle” for Channels 1-4. These set the angles for the individual colors CMYK. Just as in screen printing you can see moire. Moire is a “pattern” due to the interaction, proximity, and angles of each of the colors. Screen printers run into this issue all the time. It will result in a horrible looking print. You may need to experiment a little with the angles based on your Max. Radius Size. You can use the above settings to give you a start.
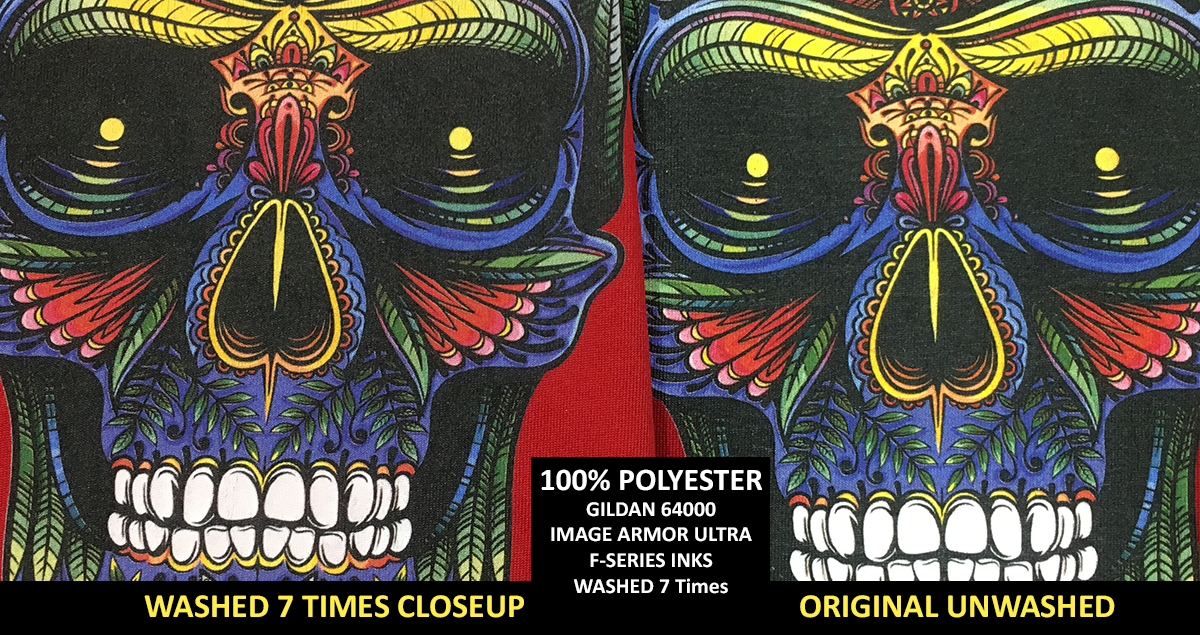
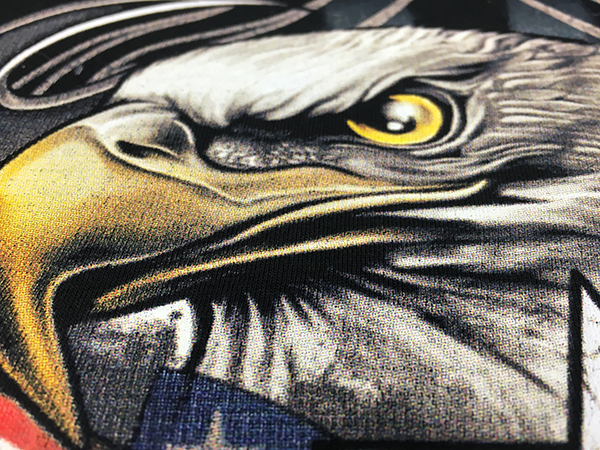
- Print your DTG image. Our example looks like the following.

As you can see, the close up looks very similar to a high end halftone screen printed design. By playing around with the settings and angles, you will be able to achieve a variety of looks that suit the effect you are trying to achieve.
To really add the touch to your DTG print to make it look like it was officially screen printed do not use your heat transfer press to cure the ink. This will “flatten” the dots in the image. Traditionally screen printed shirts have a “feel” or hand to the final print. Due to the texture of the shirt and how the inks are jetted by your DTG machine, using a conveyor dryer will help you achieve that look and feel also adding more realism to your Screen Printed DTG shirt.
Have fund and enjoy!